Blockout
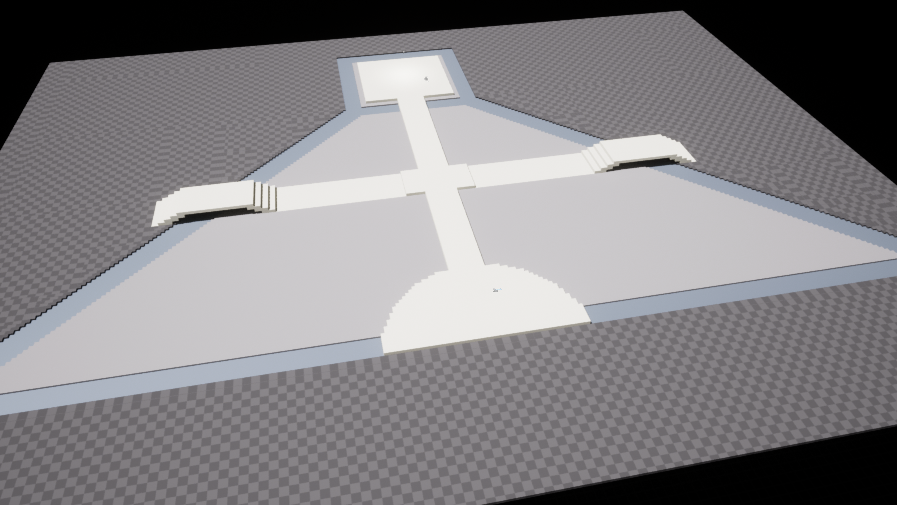
To give myself a better idea of what I wanted the final layout of the environment to look like, I decided to create a blockout. This is an easy way to roughly work out how you want things to look in the final product, without having to do all of the work just to not like the layout you chose.
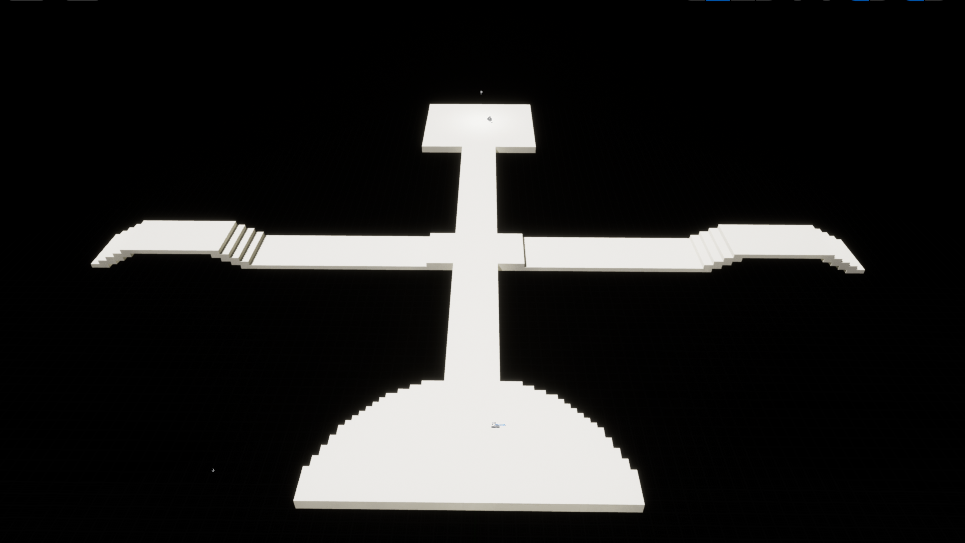
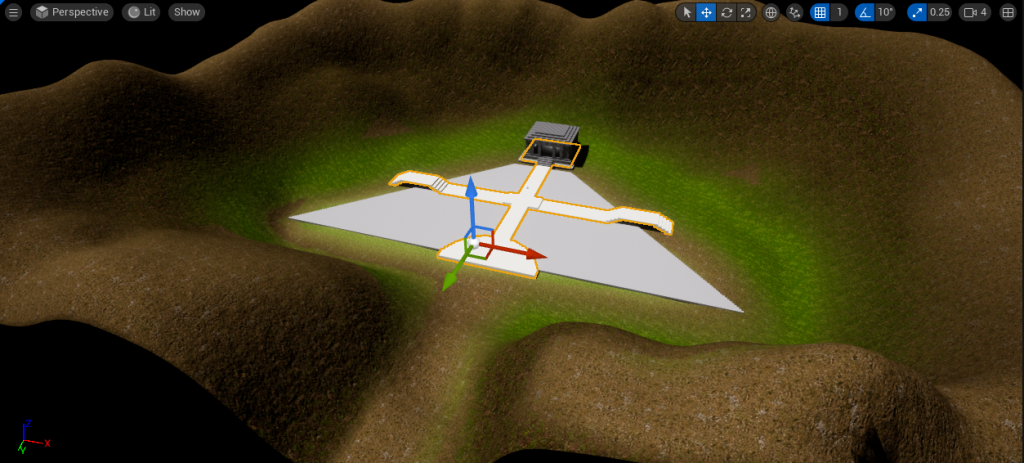
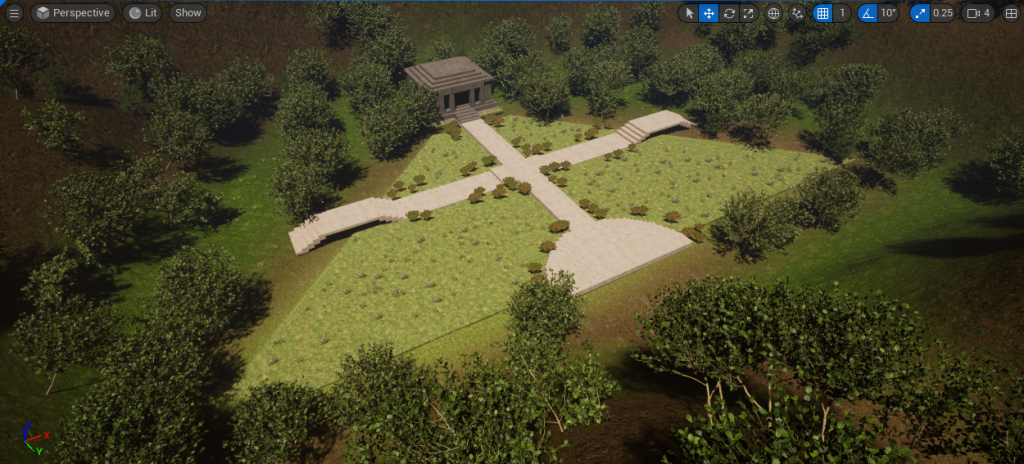
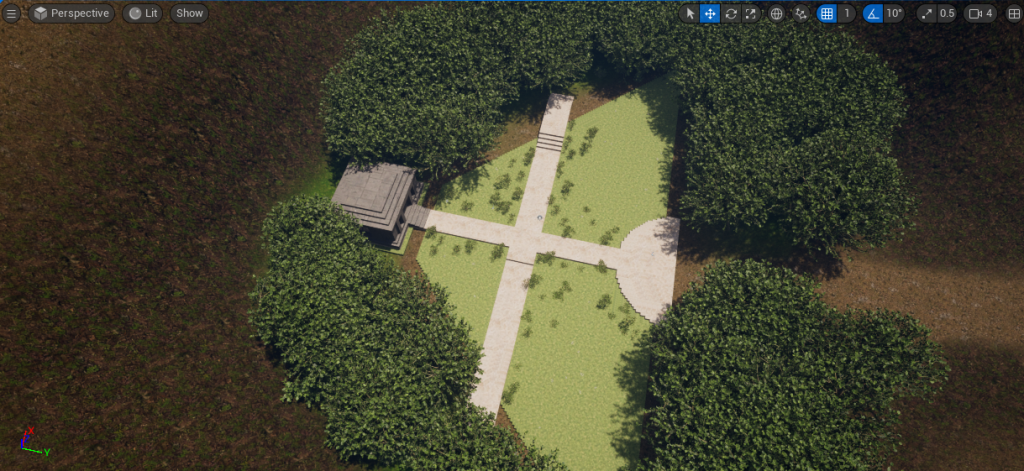
I started by using the Cube Grid tool within Unreal Engine 5 to create a plan of how I want the paths to look within my landscape. I wanted the semi circle to be where the viewer would start from, giving them a clear path forward and leading them through the scene. I also chose to have a diverging path to both the left and the right, allowing me to divide up the area where I plan to put gardens, meaning it won’t be just one big field.
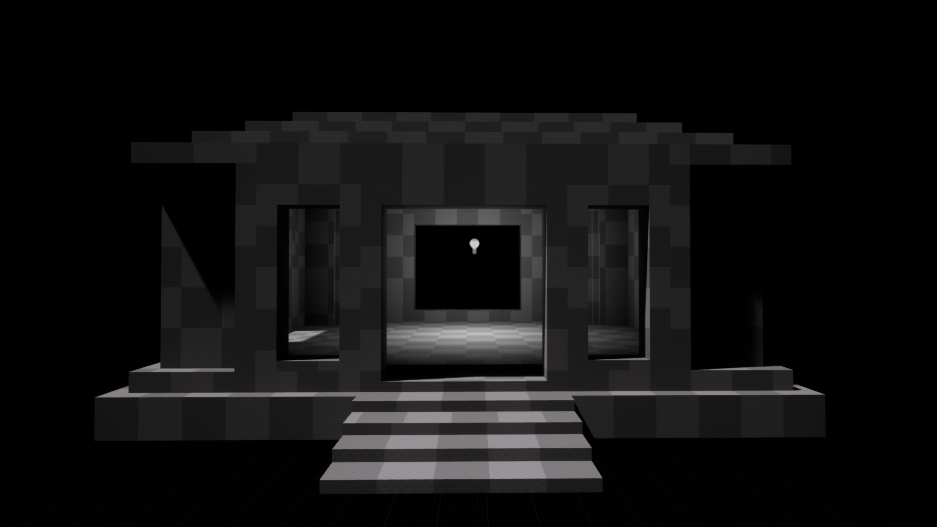
For the temple itself, I build it in the same tool as before, utilising the power of tool, which allowed me to alter the cube size that I was building with, providing a greater degree of detail. I also added a directional light so I was able to see the detail inside of the building that I was creating.
After building the temple, I added another plane to represent the gardens and the surrounding area, planning to later remove the outer mesh before I create the actual landscape.
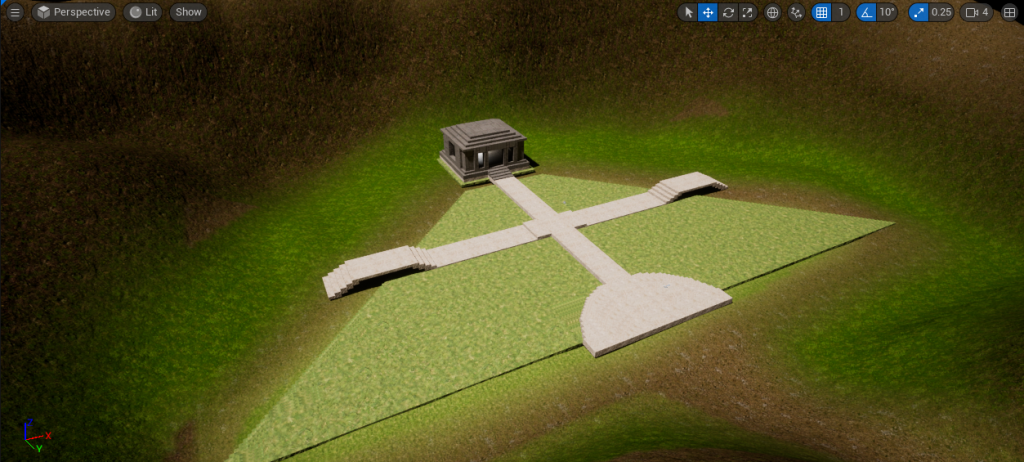
Once I had created this blockout, I felt much more secure in my landscape idea, as this allowed to to fully visualise it and see how it would look as if I had finished it.
Creating The Landscape
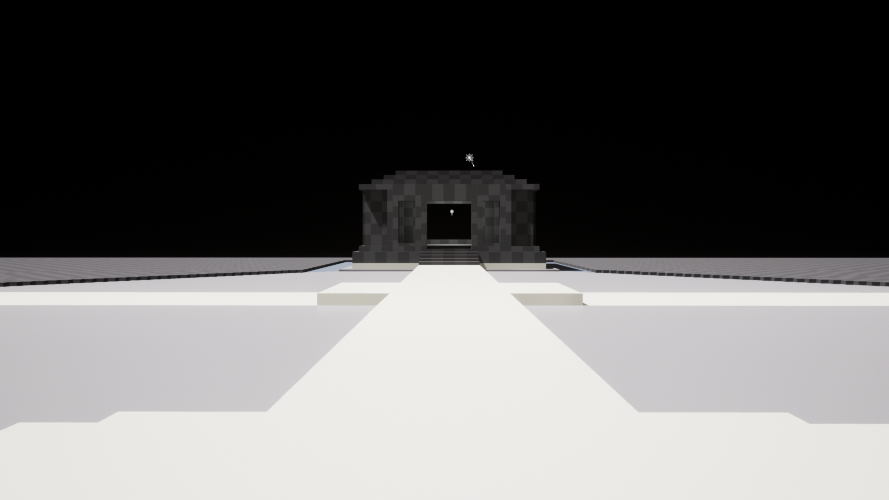
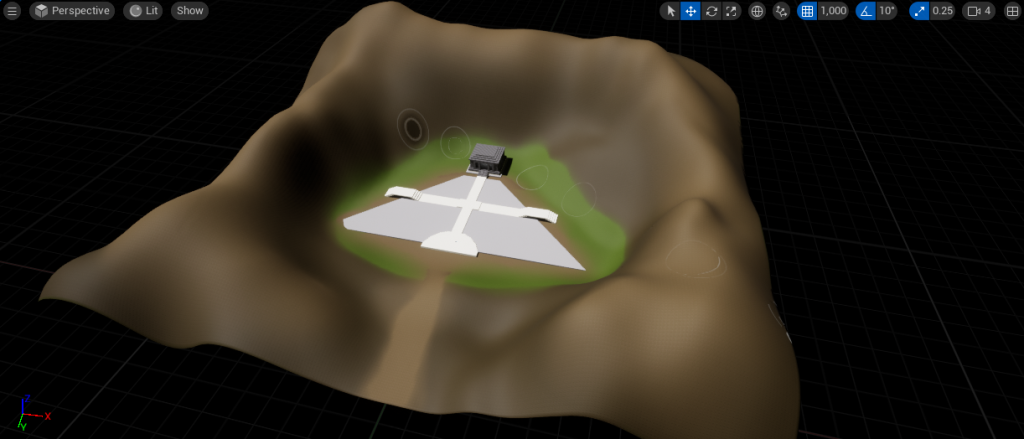
After making the blockout, it was time to move onto the landscaping. First I removed the old plane as it was no longer necessary but would still show up in the play window, meaning I had to get rid of it. I then used the sculpt brush to create hills around the edge of the landscape, making it so that the camera wouldnt be able to see into the void from the building and garden. I then sunk a path into the middle of the wall that would be the ‘entrance’ to the environment. Next was just the smoothing tool to make sure any jagged edges were dealt with and the hills worked well together.
Once I had done this, I had to create a material which allowed me to paint with different textures to create a blended effect. Using Quizel Bridge, I was able to find three ground textures which I thought fit my environment quite well. Once I had these downloaded and added to my project, I made a material combining all three textures, allowing me to paint with them in the landscaping tab once I assigned the material to the landscape mesh.
With these three different brushes, I painted the gradient landscape above, using the smooth tool to help blend the edges between materials. Using more materials I found on Quixel, I also textured the path, surrounding grass and the temple itself. Once I had assigned each of the materials, I had to change the tiling slightly as they first appeared too small but it was an easy fix.
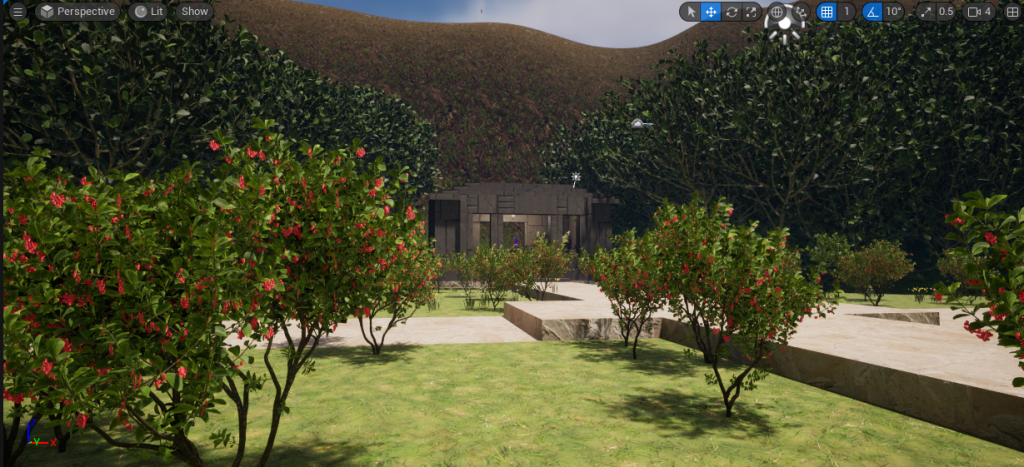
Once I had finished with the Landscaping tool, I began to use the foliage toll which allows you to add whatever foliage you would like to place to a brush and each click places a randomised amount of what you have selected. After gathering assets from Quixel, I used this tool to distribute both trees and the surrounding flowers. This method is much more efficient than placing each asset individually, as this speeds up the process significantly.
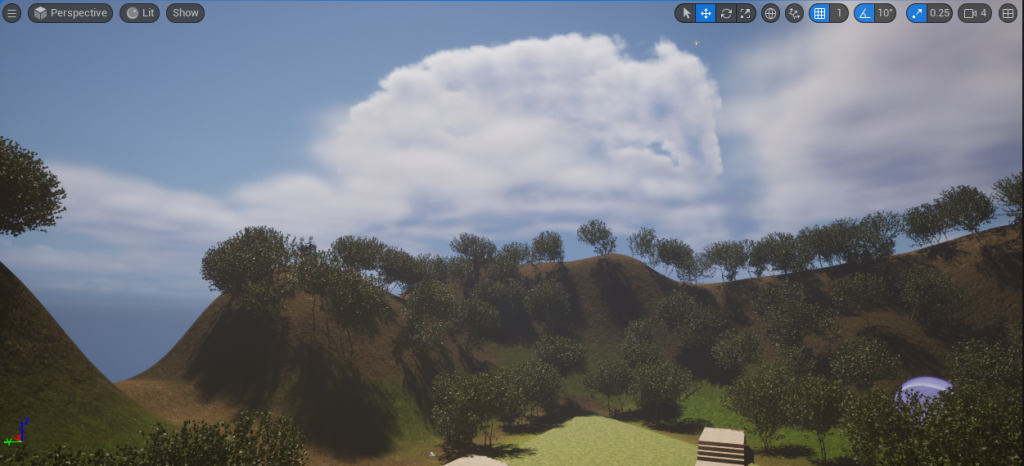
I also added clouds and sky lighting, managing to move the light so the shadows were cast in the exact way that I wanted. This brought my environment to life, making it more than just a collection of assets and making it feel almost real.
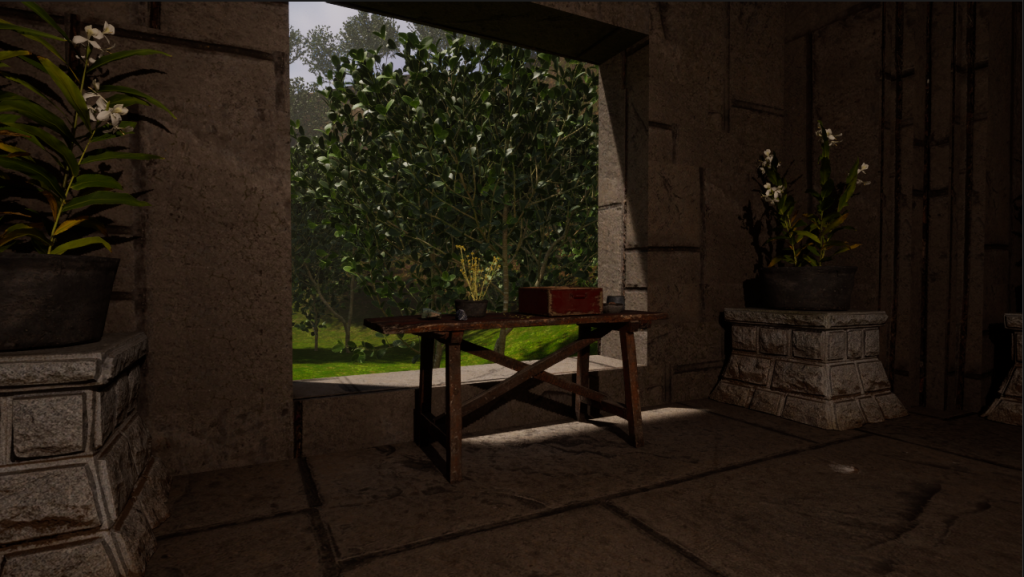
Once I had finished with the gardens, I moved on to decorating the interior of the temple. I added tables by each window as well as pedestals and lanterns to decorate the sides of the room.
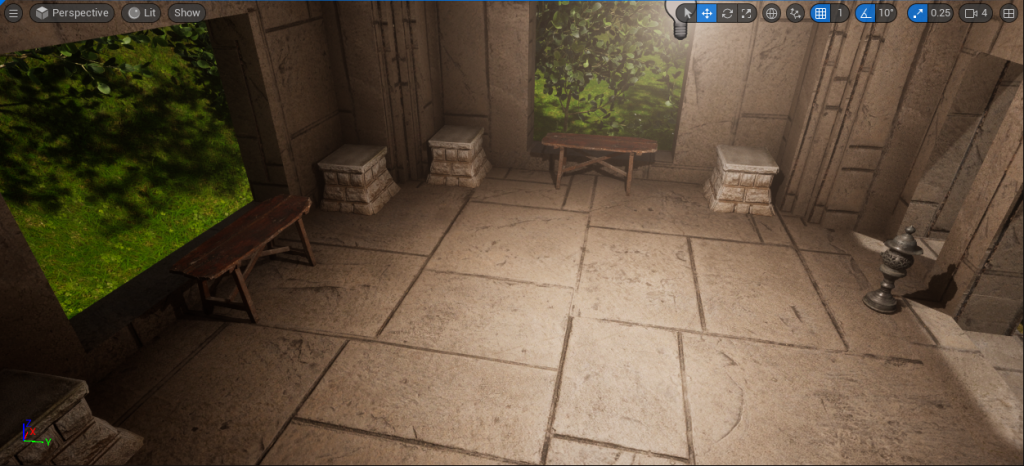
On each of these tables, I added a variety of crystals, bowls, planters and flowers to help give that forest fantasy feeling. As well as this, on eacch of the pedestals, I increased the size of one of the bowls I had found on Quixel and used it as a large plant pot for a plant I originally downloaded for the gardens outside but thought it fit better as a large potted plant inside this open room.
Restarting My Environment
Despite having multiple backups of my environment, Unreal lost all of my progress I had made in the past month, so I was forced to start from the beginning. Luckily I had all of my materials and assets prepared this time so the process took less time than it did initially.
I did not try to replicate everything I did previous exactly as that would have taken much longer, but I am still happy with the end result. I decided to create a more dense forest this time, as orignally I had downloaded high quality trees, which caused a major amount of lag. Whereas this time, I made sure to download low quality trees, allowing me to place my desired amount without fear of crashes of low frame rate.
This second attempt at my environment turned out to be more of a blessing in the end, as it allowed me to change things that did not work right with the original, being proof that I have been activley learning ways to fix my errors in Unreal. I not only fixed the lagging issue, but due to the error I faced, I took much more care and attention when it came to creating the landscape, meaing I spotted errors before they became an unfixable issue.